Google Cloud Compute Engine Instance and Putty SSH
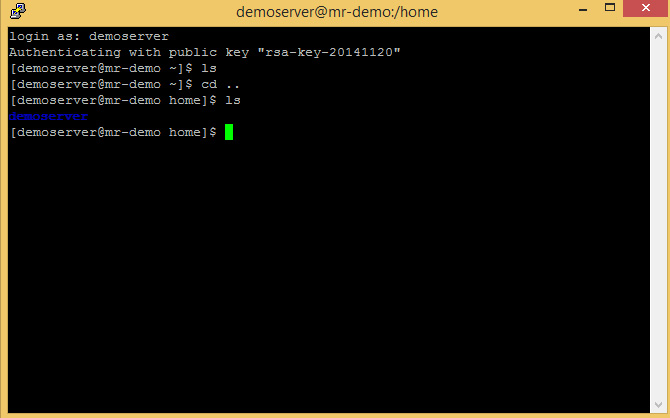
Compute engine instance and putty SSH contd
This tutorial is a continuation of my old tutorial on Google cloud services, SSH Google compute engine instance via putty
Back to Google Cloud console.
login to Google Cloud console. Select the Google compute engine VM instance.
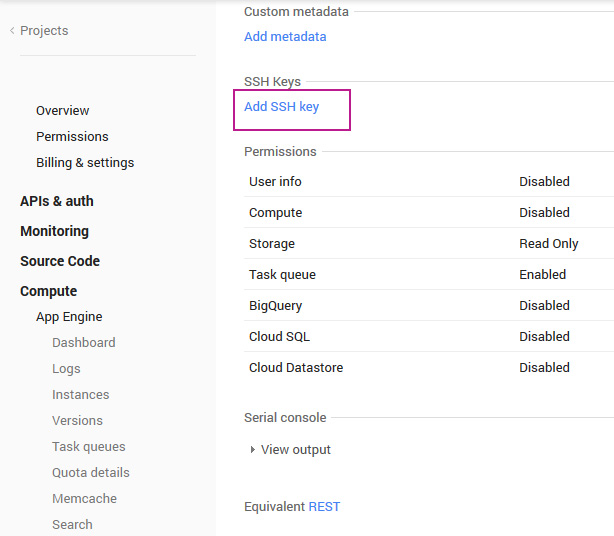
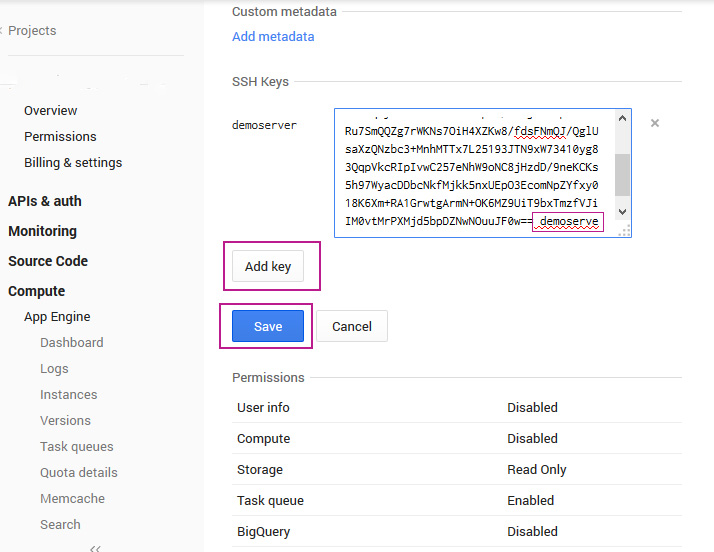
Scroll down to SSH, below Add metadata. Click on “add SSH key”.
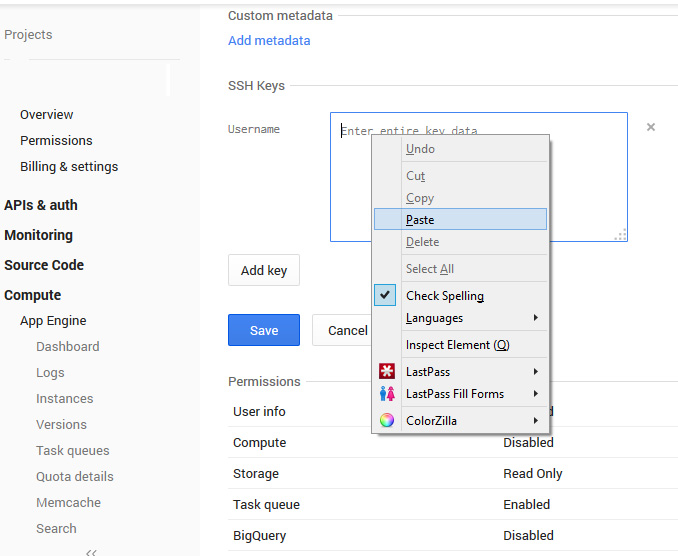
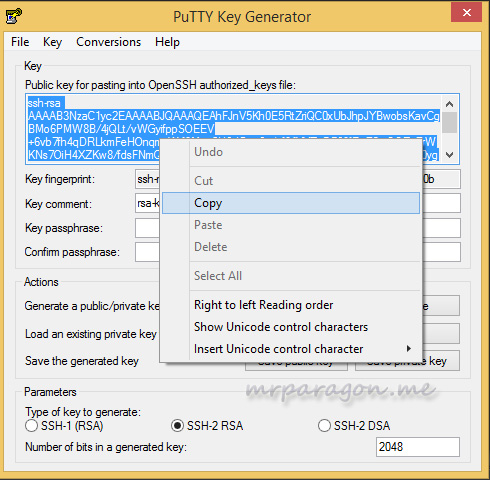
Paste the key (public key) copied from the test editor
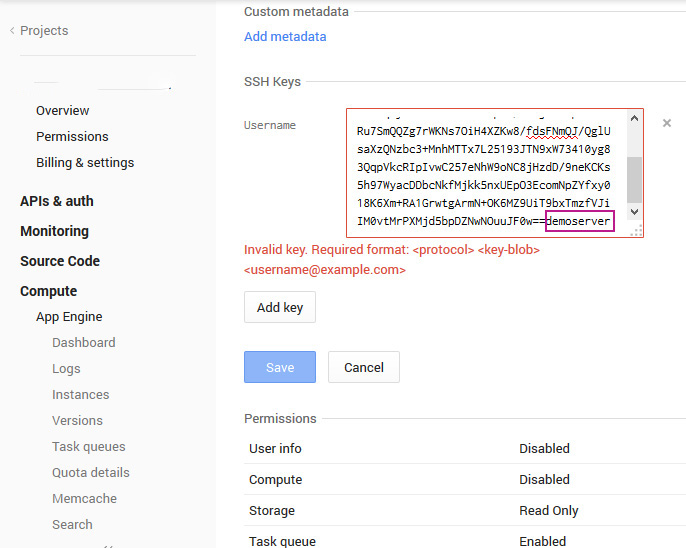
If you get errors like the one below (see screenshot),
it could be due to line breaks in the key you pasted. Close in the empty space. Ensure that there is a blank space between the key and your username (in this case, username= demoserver). If the key syntax is correct, the error will disappear. You can add more keys for other users as well, just repeat the previous steps. Once you have succeeded in adding the key, save your changes. (see screenshot below).
It is time to enjoy our long hours of reading, fire up putty and let’s have some fun.
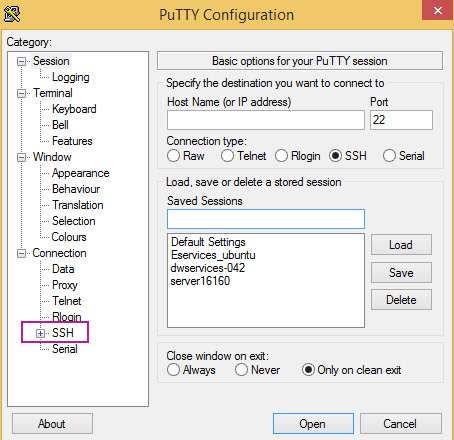
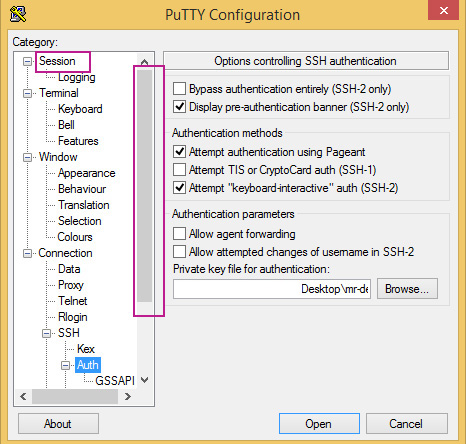
Open putty.
Expand SSH (click on + sign).
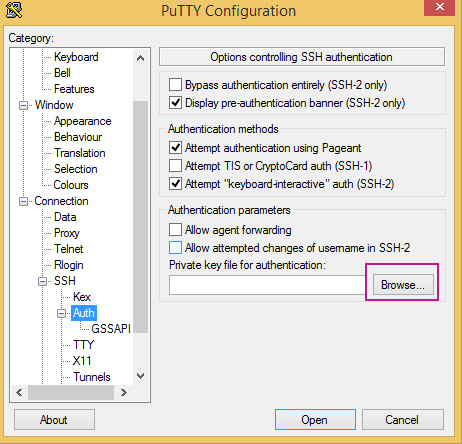
Select “Auth” from the expanded list.
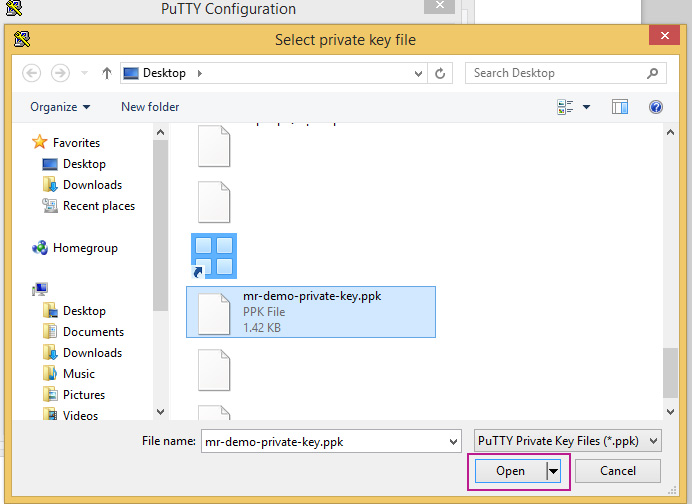
Click on browse, locate the private key we saved earlier.
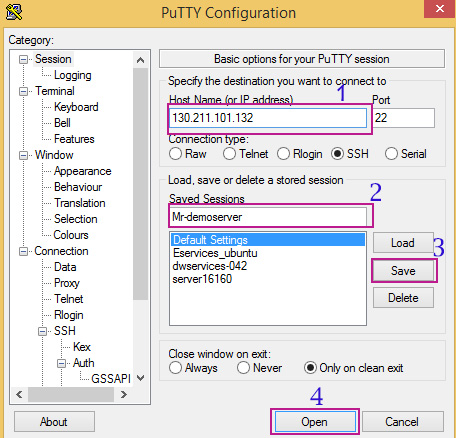
compute engine instance and putty SSH | Adding session.
Scroll back to session.
Follow the steps in the screenshot below.
1. Enter host name /IP: See description /screenshot below.
The host name / IP. This is the same as the Google Compute engine instance external IP address
2.Saved session: Provide any name you like, this will enable us connect back to the server anytime with our saved settings.
3.Save button: Click to save session.
4. Open: Open connection to Google compute engine instance.
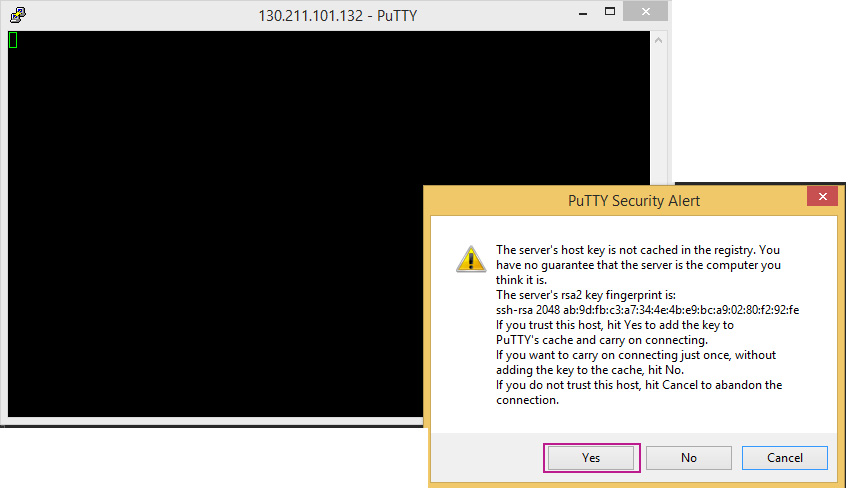
Putty establishes connection to Google compute engine instances.
We did not add passphrase to our key so when prompted, Click “YES”.
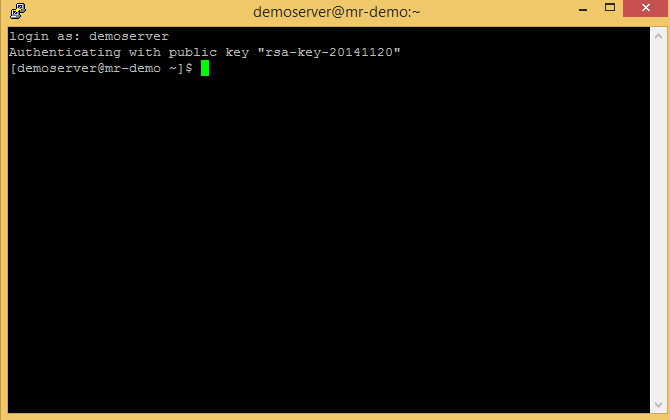
Login As: Enter username.
Authentication complete.
Of course, we can start installing other applications and doing cool stuff with your server.
More tutorials coming up see, https://mrparagon.me/category/the-web/cloud/







Thank you for clearing thing up. I’m new to Google cloud, you post helped me, I have been at the glance out for such info.