How to Backup WordPress Installation with BackUpBuddy

Background
Backupbuddy is a wordpress plugin that is used for making complete(full backup) or partial (database backup) backup of wordpress installation. It is a commercial plugin but it’s worth it, especially for every wordpress developer out there. You can always do your development on a local server (using wamp, xampp etc) before uploading to a live server. That’s the way i do it, and that’s the way every developer out there will like to do it if all resources are available. So let’s do it.
Assumptions
I assume that you have basic knowledge of wordpress.
I assumed that you have backupbuddy installed (if you don’t have backupbuddy, you can purchase the license).
(backupbuddy installation process is same with other wordpress installation. No special skill is required).
Step by step guide
Login to your wordpress dashboard.
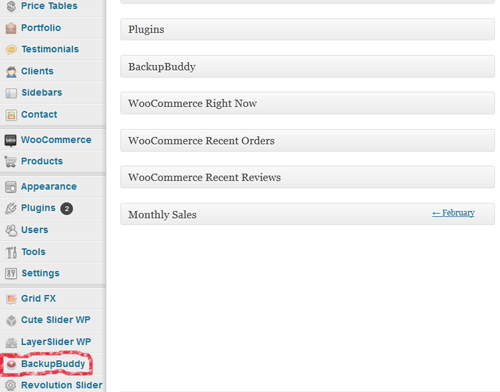
On the left side of the dashboard, locate backupbuddy option.
Click on backupbuddy to view options (select “Backup” from the options)
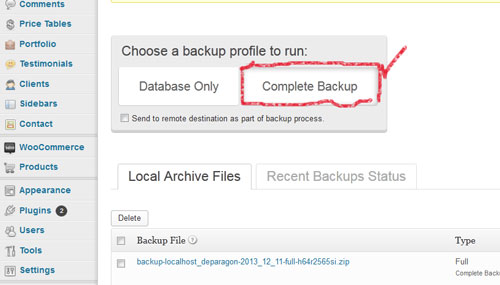
Choose the type of backup (Complete backup)

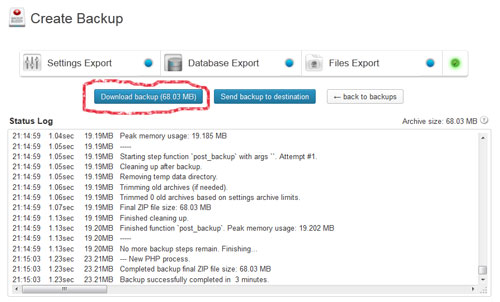
Once you choose the type of backup, the backup process will be initiated (depending on the size of files and database, this may take a while)
Once backup completes, download the file.

Restore/Migration process
Ready to upload to a live server.
Select “Restore /Migrate” from the menu option under backupbuddy on your wordpress dashboard.

Click on “Restore/Migrate” option to navigate to importbuddy.php download page

Once you click on “download importbuddy” option, you will be prompted to enter restoration password. This password will be required when you will be restoring your wordpress installation on a live server. (take note).
You have successfully completed backup process of your entire wordpress site.
See link below for wordpress restoration / migration go a live server
how to migrate your wordpress files to a live server using backupbuddy.
Thanks for reading, Your comments are welcomed.


Leave a Comment